


Maintenance And Maintenance Of Lead-Acid Batteries
|
Do you know the main reason lead-acid batteries break down and lose capacity? Battery sulfation. It’s the cause of these issues 80% of the time. But with the right tools for battery maintenance and a little investment of time, you’ll bring your batteries back to life and keep them functioning reliably. Learn everything you need to know about battery maintenance. Batteries are poorly understood, even by that living off-grid that depend on them for power. A better understanding of the inner-workings would go a long way in keeping those batteries happy. Given how expensive batteries are, and how they are a major (recurring) expensive of an overall off-grid system, battery care should be high on everyone’s off-grid list. Starter batteries, semi-traction batteries, traction batteries, and even stationary batteries all need maintenance to perform to their full potential. Regularly perform the six essential maintenance tasks we outline here to optimize the performance and reliability of your lead-acid batteries. Regular Inspection and Maintenance Regular testing and inspection will help to maximize battery life. A routine inspection at least once a month is recommended to maintain optimum performance.
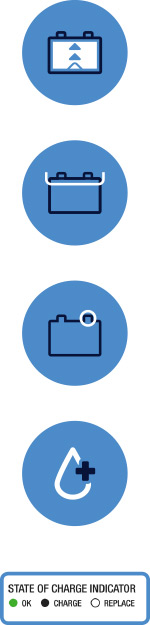
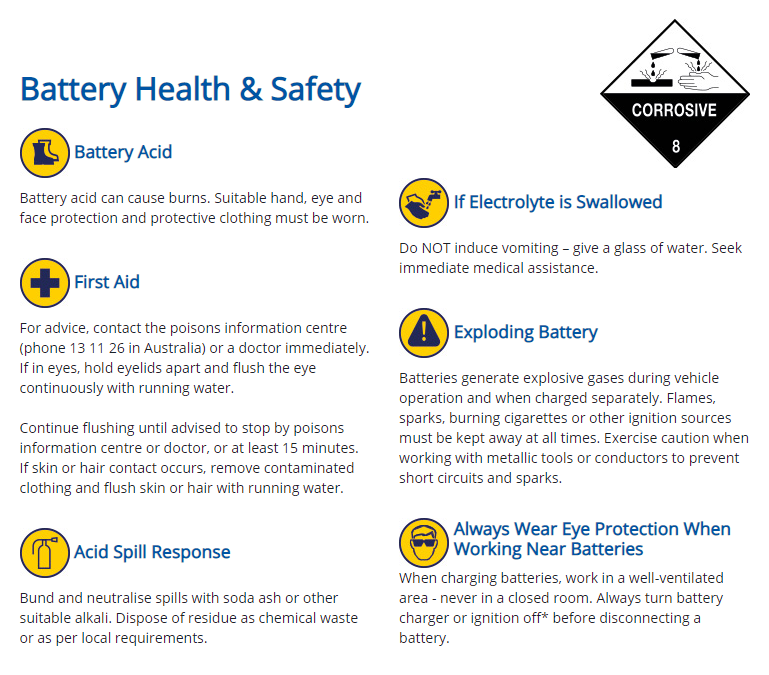
Add distilled water to the lead-acid batteryThe fluid in your lead-acid battery is called electrolyte. It’s actually a mixture of sulphuric acid and water. When your battery charges, the electrolyte heats up and some of the water evaporates. During a process called electrolysis, the water breaks down into hydrogen and oxygen gases that dissipate. The result? The electrolyte level in the battery lowers over time. If the electrolyte level is too low, the plates in the battery cells are exposed and will suffer damage. In addition, the sulphuric acid will be more concentrated. This means you need to replace the electrolyte. This is how you do it. 1. Check the battery water level with a level indicator How do you know when to add water to your battery? It’s one of the most common questions we are asked. You could constantly check your battery or every battery in every machine in your fleet, but this is horribly time-consuming and there are easier approaches. Indicators are specifically designed to check the battery water level for you. They notify you whenever your battery needs to be topped up. There are different systems available. One of these is the Smartblinky. You mount it behind the battery plug. Does it have a green light? Your electrolyte level is fine. When the light turns red, you know it’s time to add water to the battery cells. Do you add water to your battery before or after charging? Always make sure the electrolyte covers the battery plates before you charge. If the plates are covered, charge the battery and then top up as necessary. This is because the electrolyte will expand during charging and is more likely to overflow if you’ve already topped it up before charging. 2. Make sure you always have distilled water nearby Never fill a battery with normal water. It will damage your battery. You need to use distilled water. It’s also known as deionized water and demineralized water. Basically, it’s water that has been filtered to remove metals and minerals that may interfere with the processes in your battery. Buy distilled water from a hardware store or automotive parts specialist. It’s also easy to make yourself. You need simple tap water and a demineralization device like the Hydropure. The simplest of these devices are filled with a type of resin. You let the tap water flow in, the resin filters the metals and minerals out of the water and you’re left with the deionized, demineralized, distilled water that’s suitable for use with your battery. 3. Install an automatic battery water filler system How much-distilled water do you add to your battery? That’s another question we are often asked. The answer varies from one battery to the next. This is one reason why we recommend using a battery water filler system. A battery water filler system uses filler caps with floats that are connected to each other via water hoses. They keep your battery from over-filling. And they save you time. All you do is run distilled water into the hose. The filling system does the rest. Battery Charging Charging a lead-acid battery is the process of replacing the energy removed during discharge, plus EXTRA to compensate for any charging inefficiencies. The amount of energy necessary for complete recharge depends on the depth of discharge, rate of recharge and temperature. Typically 110% - 150% of the discharged ampere-hours depending on battery type must be returned to the battery to achieve full recharge. Safety First Before attempting to charge a battery with an external battery charger, it is important to be aware of the safety precautions when charging batteries and follow the instructions outlined by the charger manufacturer. ● Turn the charger off before attaching, rocking or removing the terminal clamps. ● Keep open flames and sparks away from the battery. ● Keep vent caps in place. ● Charge in a well-ventilated area. ● Follow the battery charger manufacturer’s instructions to avoid overheating. Dangerous explosive gases are generated during the charging process that can be ignited by a variety of sources including, sparks, naked flames, and static electricity. It is highly recommended to wear PPE (Personal Protection Equipment) including safety glasses, chemical resistant gloves, and overalls. Selecting the Correct Charger Lead-acid batteries should be charged in 3 stages; constant current (boost), constant voltage (absorption) and float charge. When choosing a battery charger, it is important to select a charger that delivers the specified charging voltage and current to suit the battery type. Flooded, Absorbed Glass Mat (AGM) and Gel battery types require different charging specifications to provide optimum performance and service life. Charging Voltage (for manual chargers) Monitoring battery voltage during charging is extremely important to reduce the risk of overcharging and to check the progress of the battery during recharge. Always keep inside the parameters outlined in the below table. Failure to do so can result in permanent damage to the battery. Auxiliary Charge Voltage by Battery Type
The recommended temperature during charging is 25°C. Charging must be paused if the battery reaches 50°C. The above specifications are for 12-volt lead-acid batteries. When charging 6-volt batteries, half the voltage specifications provided. In addition to following the battery charging voltage guidelines, selecting the correct charging current (Amps) for the battery size is crucial to provide performance and service life. Charging Current (for manual chargers)
Factors Affecting Battery Life As batteries age, they gradually lose their capacity as their function is performed. The constant charge and discharge eventually lead to failure. Components corrode over time, electrical shorts occur and vibration causes damage; all eventually causing failure. Overcharging and undercharging of a battery will also have a bearing on battery life. Check electrolyte level - fluid below the tops of the separators indicates overcharging or poor maintenance. The overcharge condition may be due to incorrect voltage setting, low voltage caused by heat or internal defects, or old age deterioration. ● Is the battery loose in the carrier? This can cause failure from vibration. ● Does the battery have signs of damage or mistreatment? This can also cause failure. ● Discharged (flat) Batteries A flat battery should be checked with a hydrometer. A low Specific Gravity reading of 1.220 or less in all cells indicates a discharged battery and it must be charged before further examination and testing can occur. The discharged condition may be due to a problem in the electrical system (slipping alternator belt, faulty regulator or alternator, high resistance due to corrosion). Internal shorts may also be due to manufacturing defects or shorts through the aging process or vibration damage. Batteries often fail when least expected. The usual warning is a slower than normal battery ability to crank the engine. Other less noticeable factors, such as changing driving patterns and colder/hotter weather will all have an effect on the life of a battery. Encourage your customers to ask for a ‘FREE Battery Test’. It’s good public relations and if the battery is near failure, it may avoid the inconvenience of a roadside breakdown. |